Over the next few weeks we will be creating animated self-portraits telling a 15 to 20 second slice from your personal life. The image itself will be constructed by utilizing odds and ends, paper and fabric scraps and anything else you can incorporate into your animation. This animated self-portrait assignment has been one of my favorites for new animators and seems to really connect with the showcase audience. Some compilations have even gone on to screen in festivals. All that to say that this is a piece that will give back what you put into it.
I'm looking forward to seeing what we come up with!
1. RECORD INTERVIEW
3. MINING FOR AUDIO GOLD
4. BREAK DOWN AUDIO/LIP-SYNC PLAYBLAST
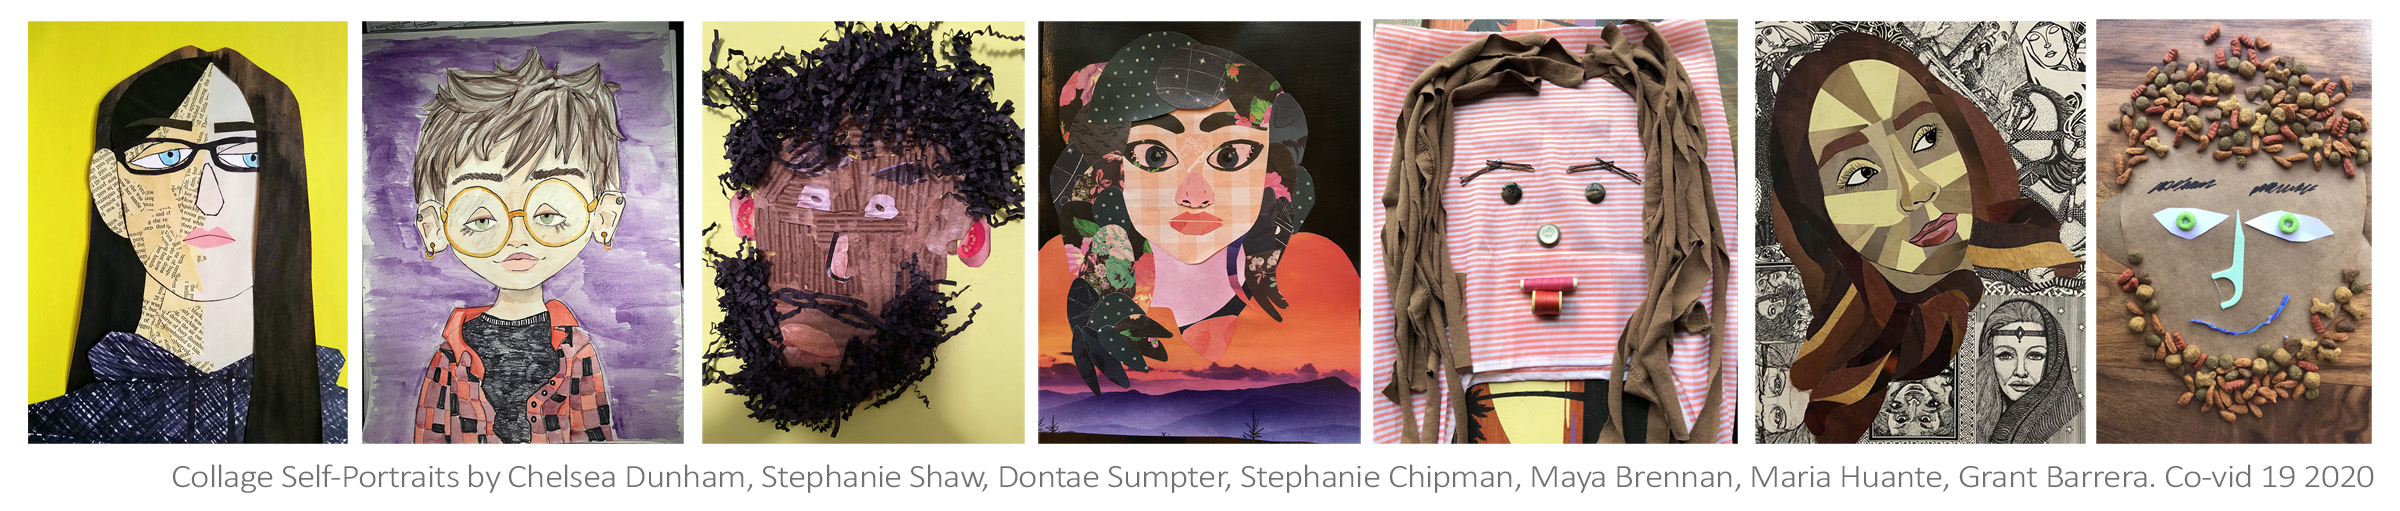
5. COLLAGE SELF-PORTRAITS
6. DESIGN CHARACTER PHONEMES
7. PITCH SECONDARY ANIMATION
8. PRE-PRODUCTION/FINAL LIP-SYNC SHOOT

Record Audio*: Record multiple takes to a single file for each student. No longer than 3-5 minutes for each session. Pause between statements and make sure the interviewer stays out of the mix as much as possible. Check levels and room tone to assure the highest sound quality possible.
The deliverables needed from each interview will be a 3-5 minute audio file (.wav) and a video file (.mov) respectively for each student.
*Video recorded exclusively for reference to help pick up on personal quirks and mannerisms.
Naming: simpsonB_lipSync_interview.wav
You will be creating three simple self-portrait sketches from the neck up. 1. Fairly realistic; 2. Stylized or Cartoon; 3. Anthropomorphized (what animal do you want to be?)
Research: Spend some time looking in the mirror, stalking your own Face Book account and watching the video footage from your interview. You will want to do some research for the last two variations. Borrowing design elements from existing cartoons can be helpful inspiration as you develop your self portraits.
You can draw your self-portraits on separate sheets of animation bond or combine three on a single sheet. I recommend starting with a red-line sketch and refining your drawings graphite. When you are finished you can shoot them with Dragonframe "Test Image" or on your smart phone and post them to the Discord #lipsync thread.
Naming:
simpsonB_selfPortraitSketches01.aiff
simpsonB_selfPortraitSketches02.aiff
simpsonB_selfPortraitSketches03.aiff
3. MINING FOR AUDIO GOLD (3 Clips)
Sift through the audio file from your interview to find three 15-20 second audio clips as possible candidates for your animation. Choose scenarios that you feel inspired to animate to. At this stage you want to cast your net a little wide. In other words, if the audio goes a little long or you combine a few short samplings from separate parts of the interview, we can work later on reigning them in to fit the assignment.
Once you have identified what you need use editing software to create three short clips that you'll pitch to class. Adobe Audition is a great Audio editing tool that's fairly intuitive. You can also use Adobe Premiere if you are making simple cuts. Export you audio as .aiff or .wav files to maintain the highest quality.
Specs:
Post & Submit: Submit all three versions to the Base Camp Drop Box.
Naming:
simpsonB_interview01.aiff
simpsonB_interview02.aiff
simpsonB_interview03.aiff

Breakdown Audio and Assign Phonemes: Once an audio clip has been selected and edited, use Dragonframe to break down the audio frame by frame to determine sound queues and arrange phonemes and blinks.
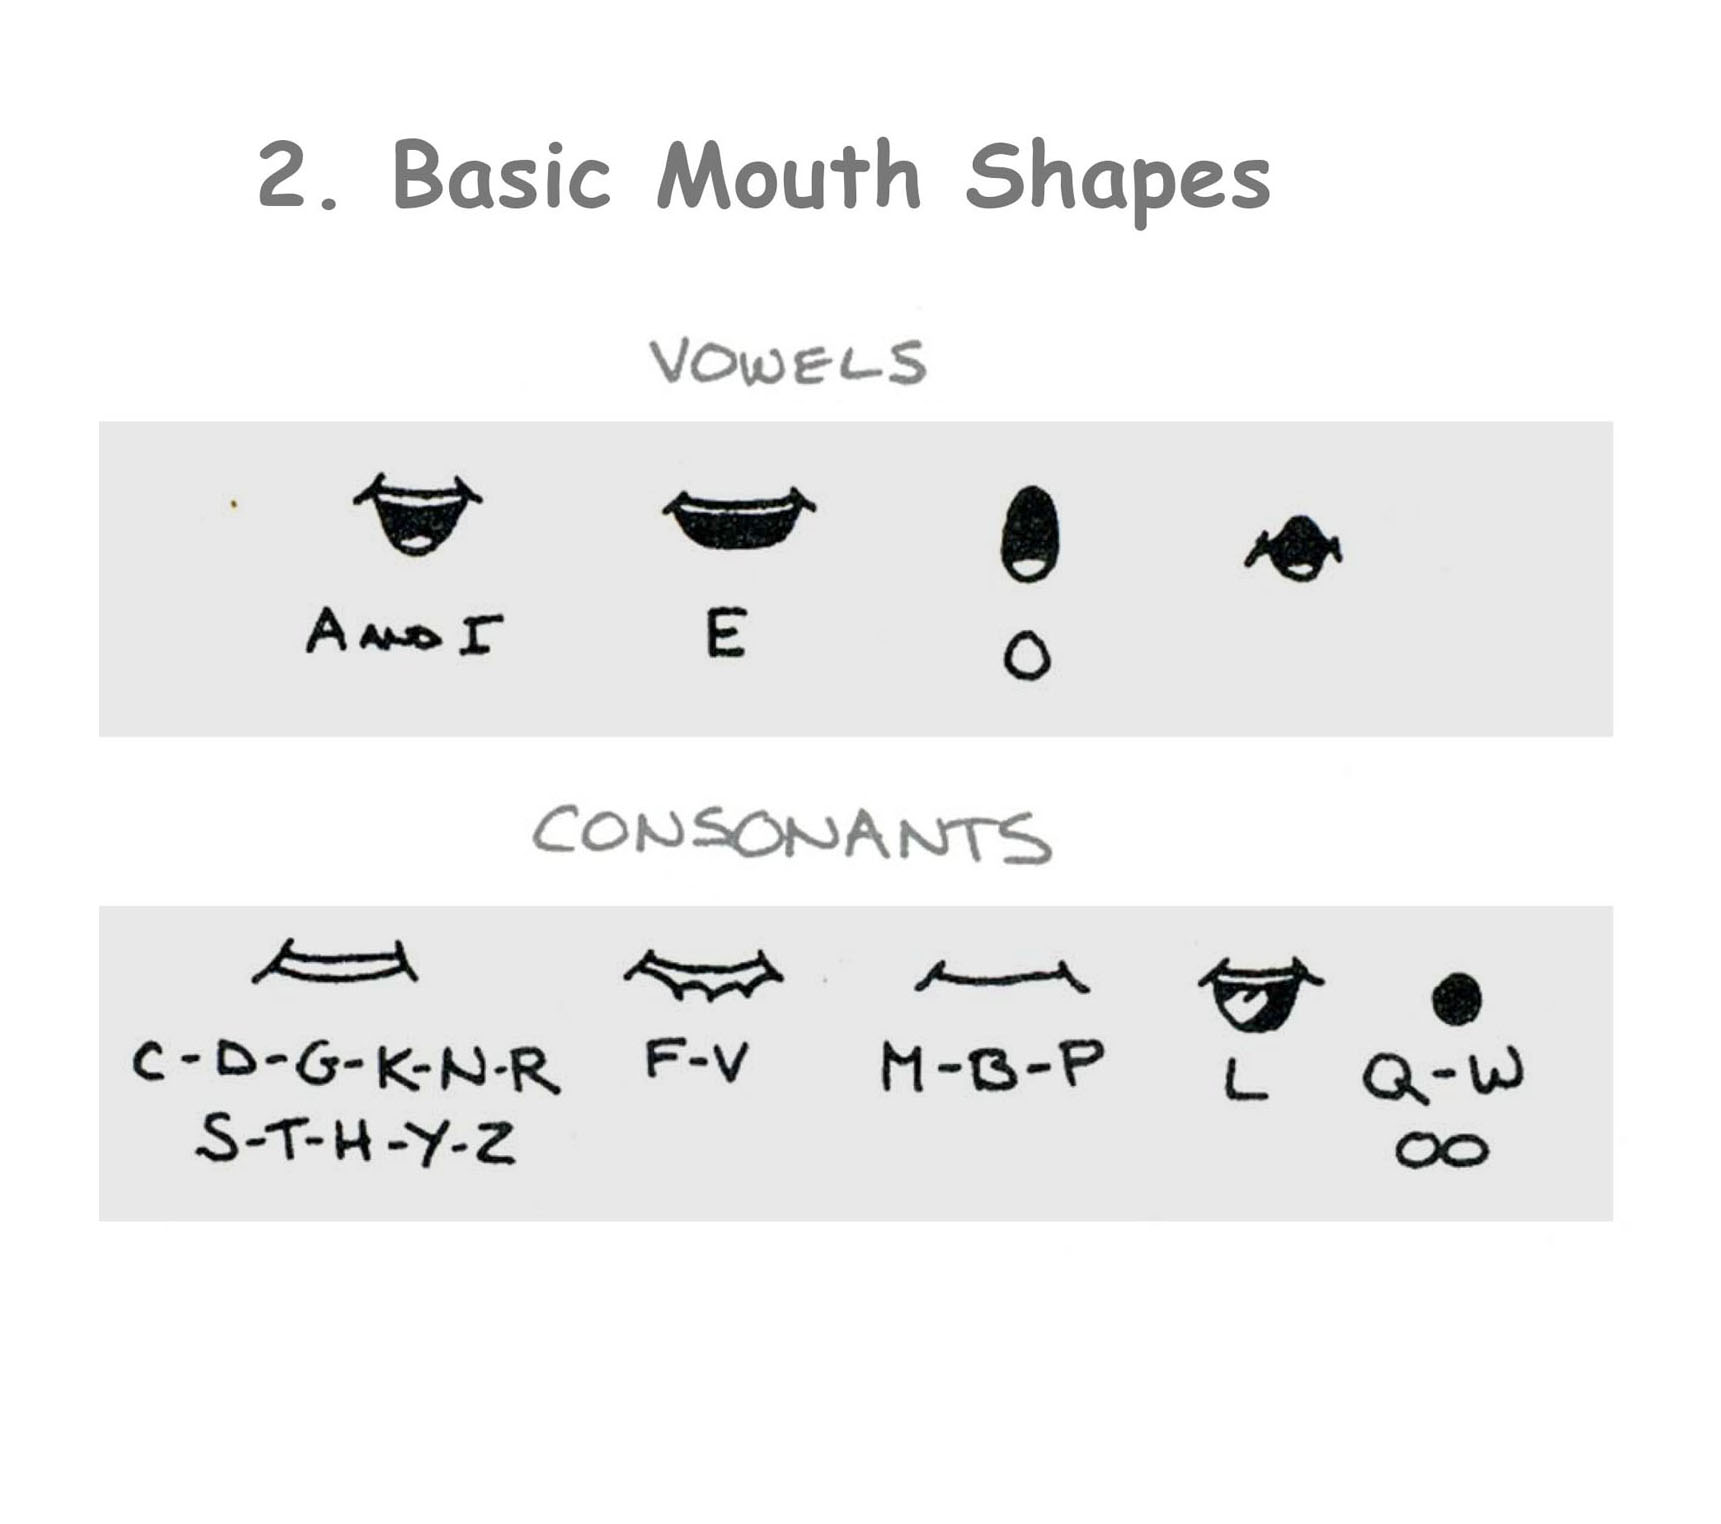
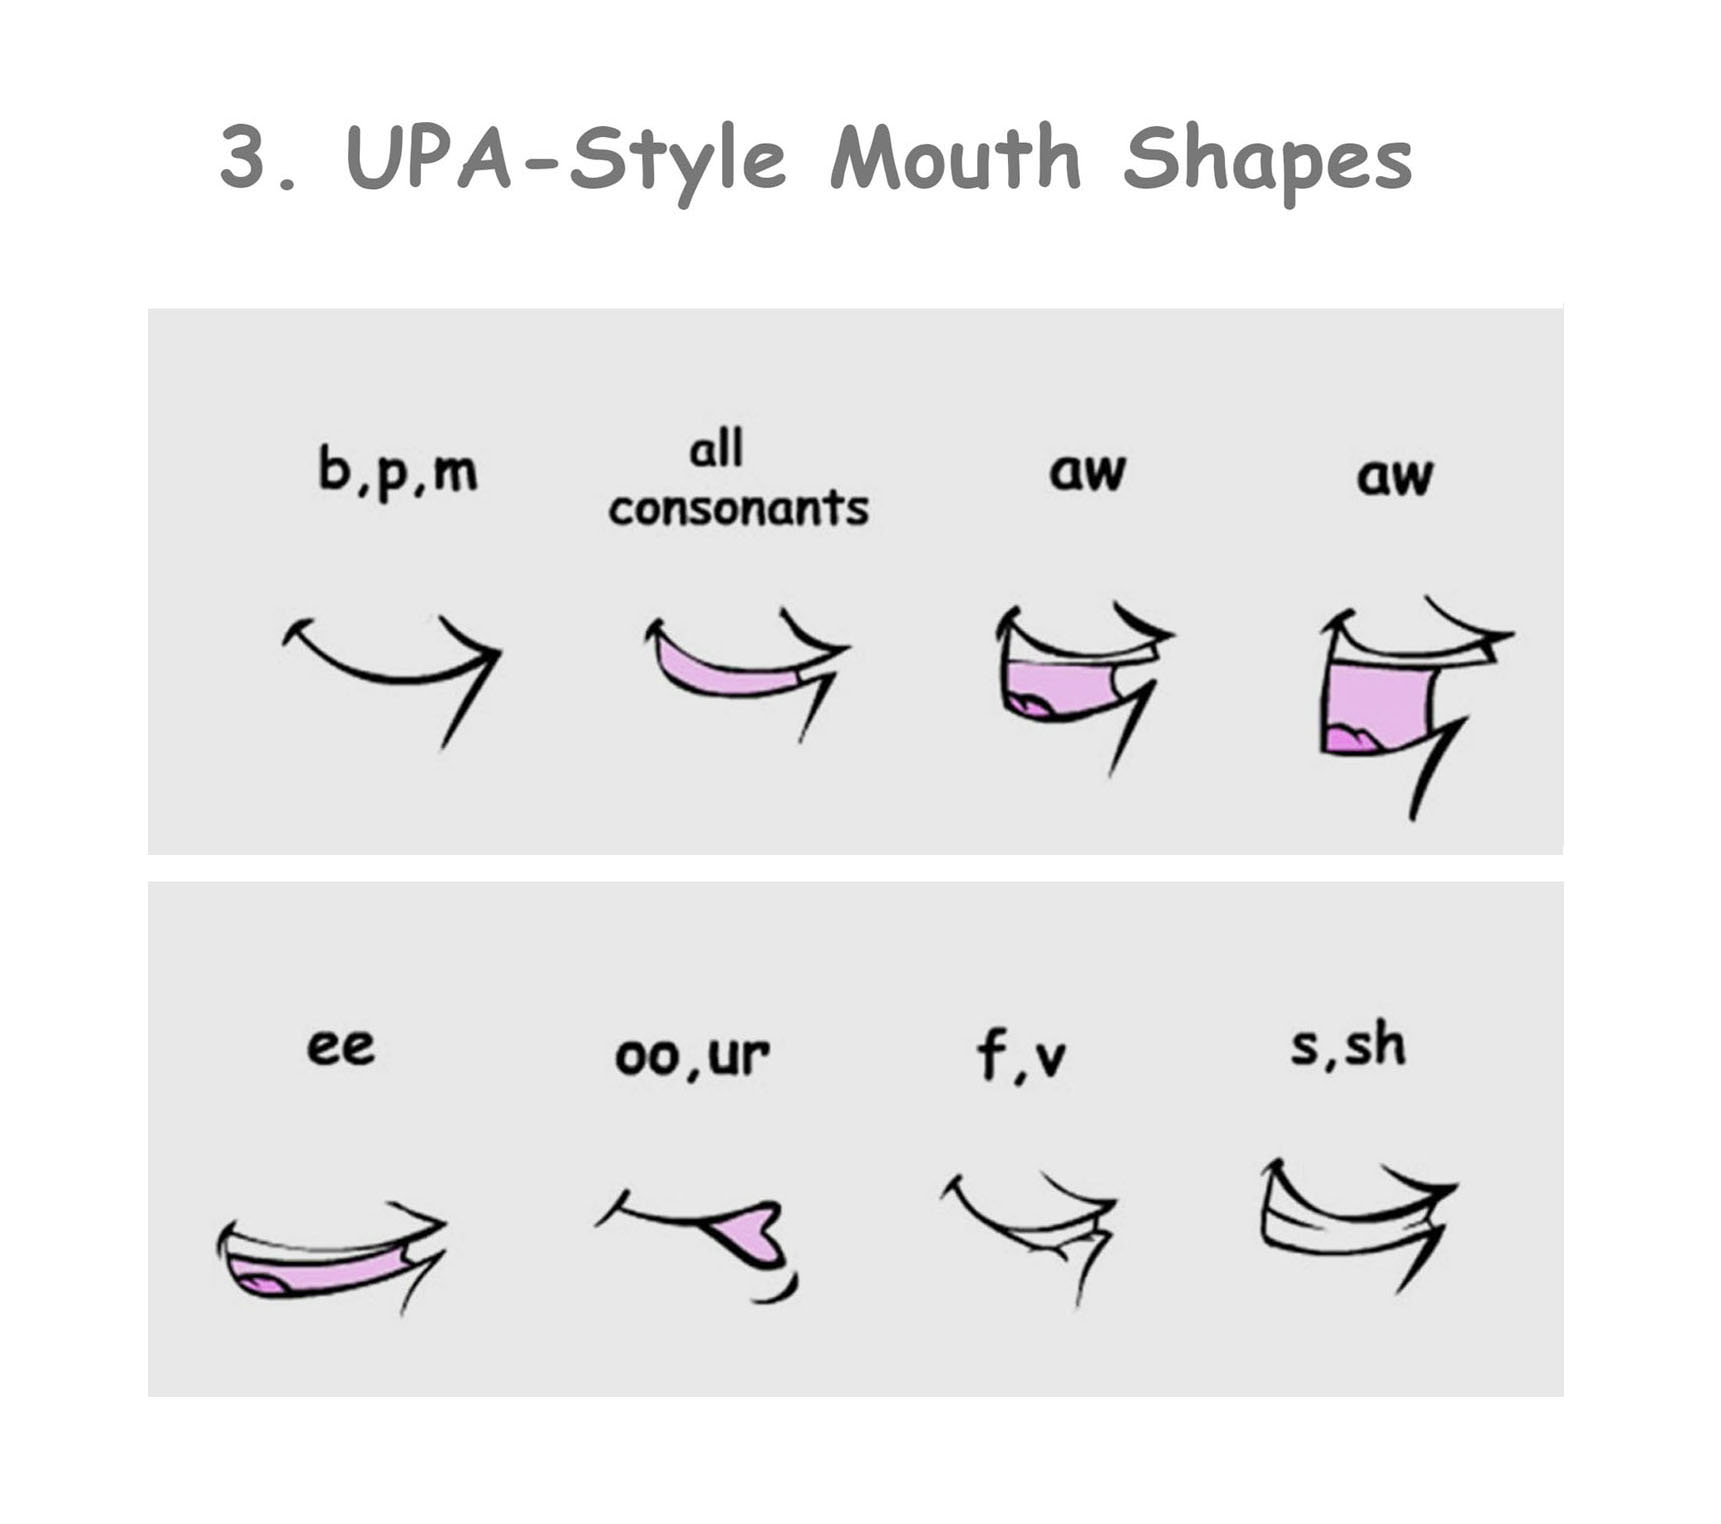
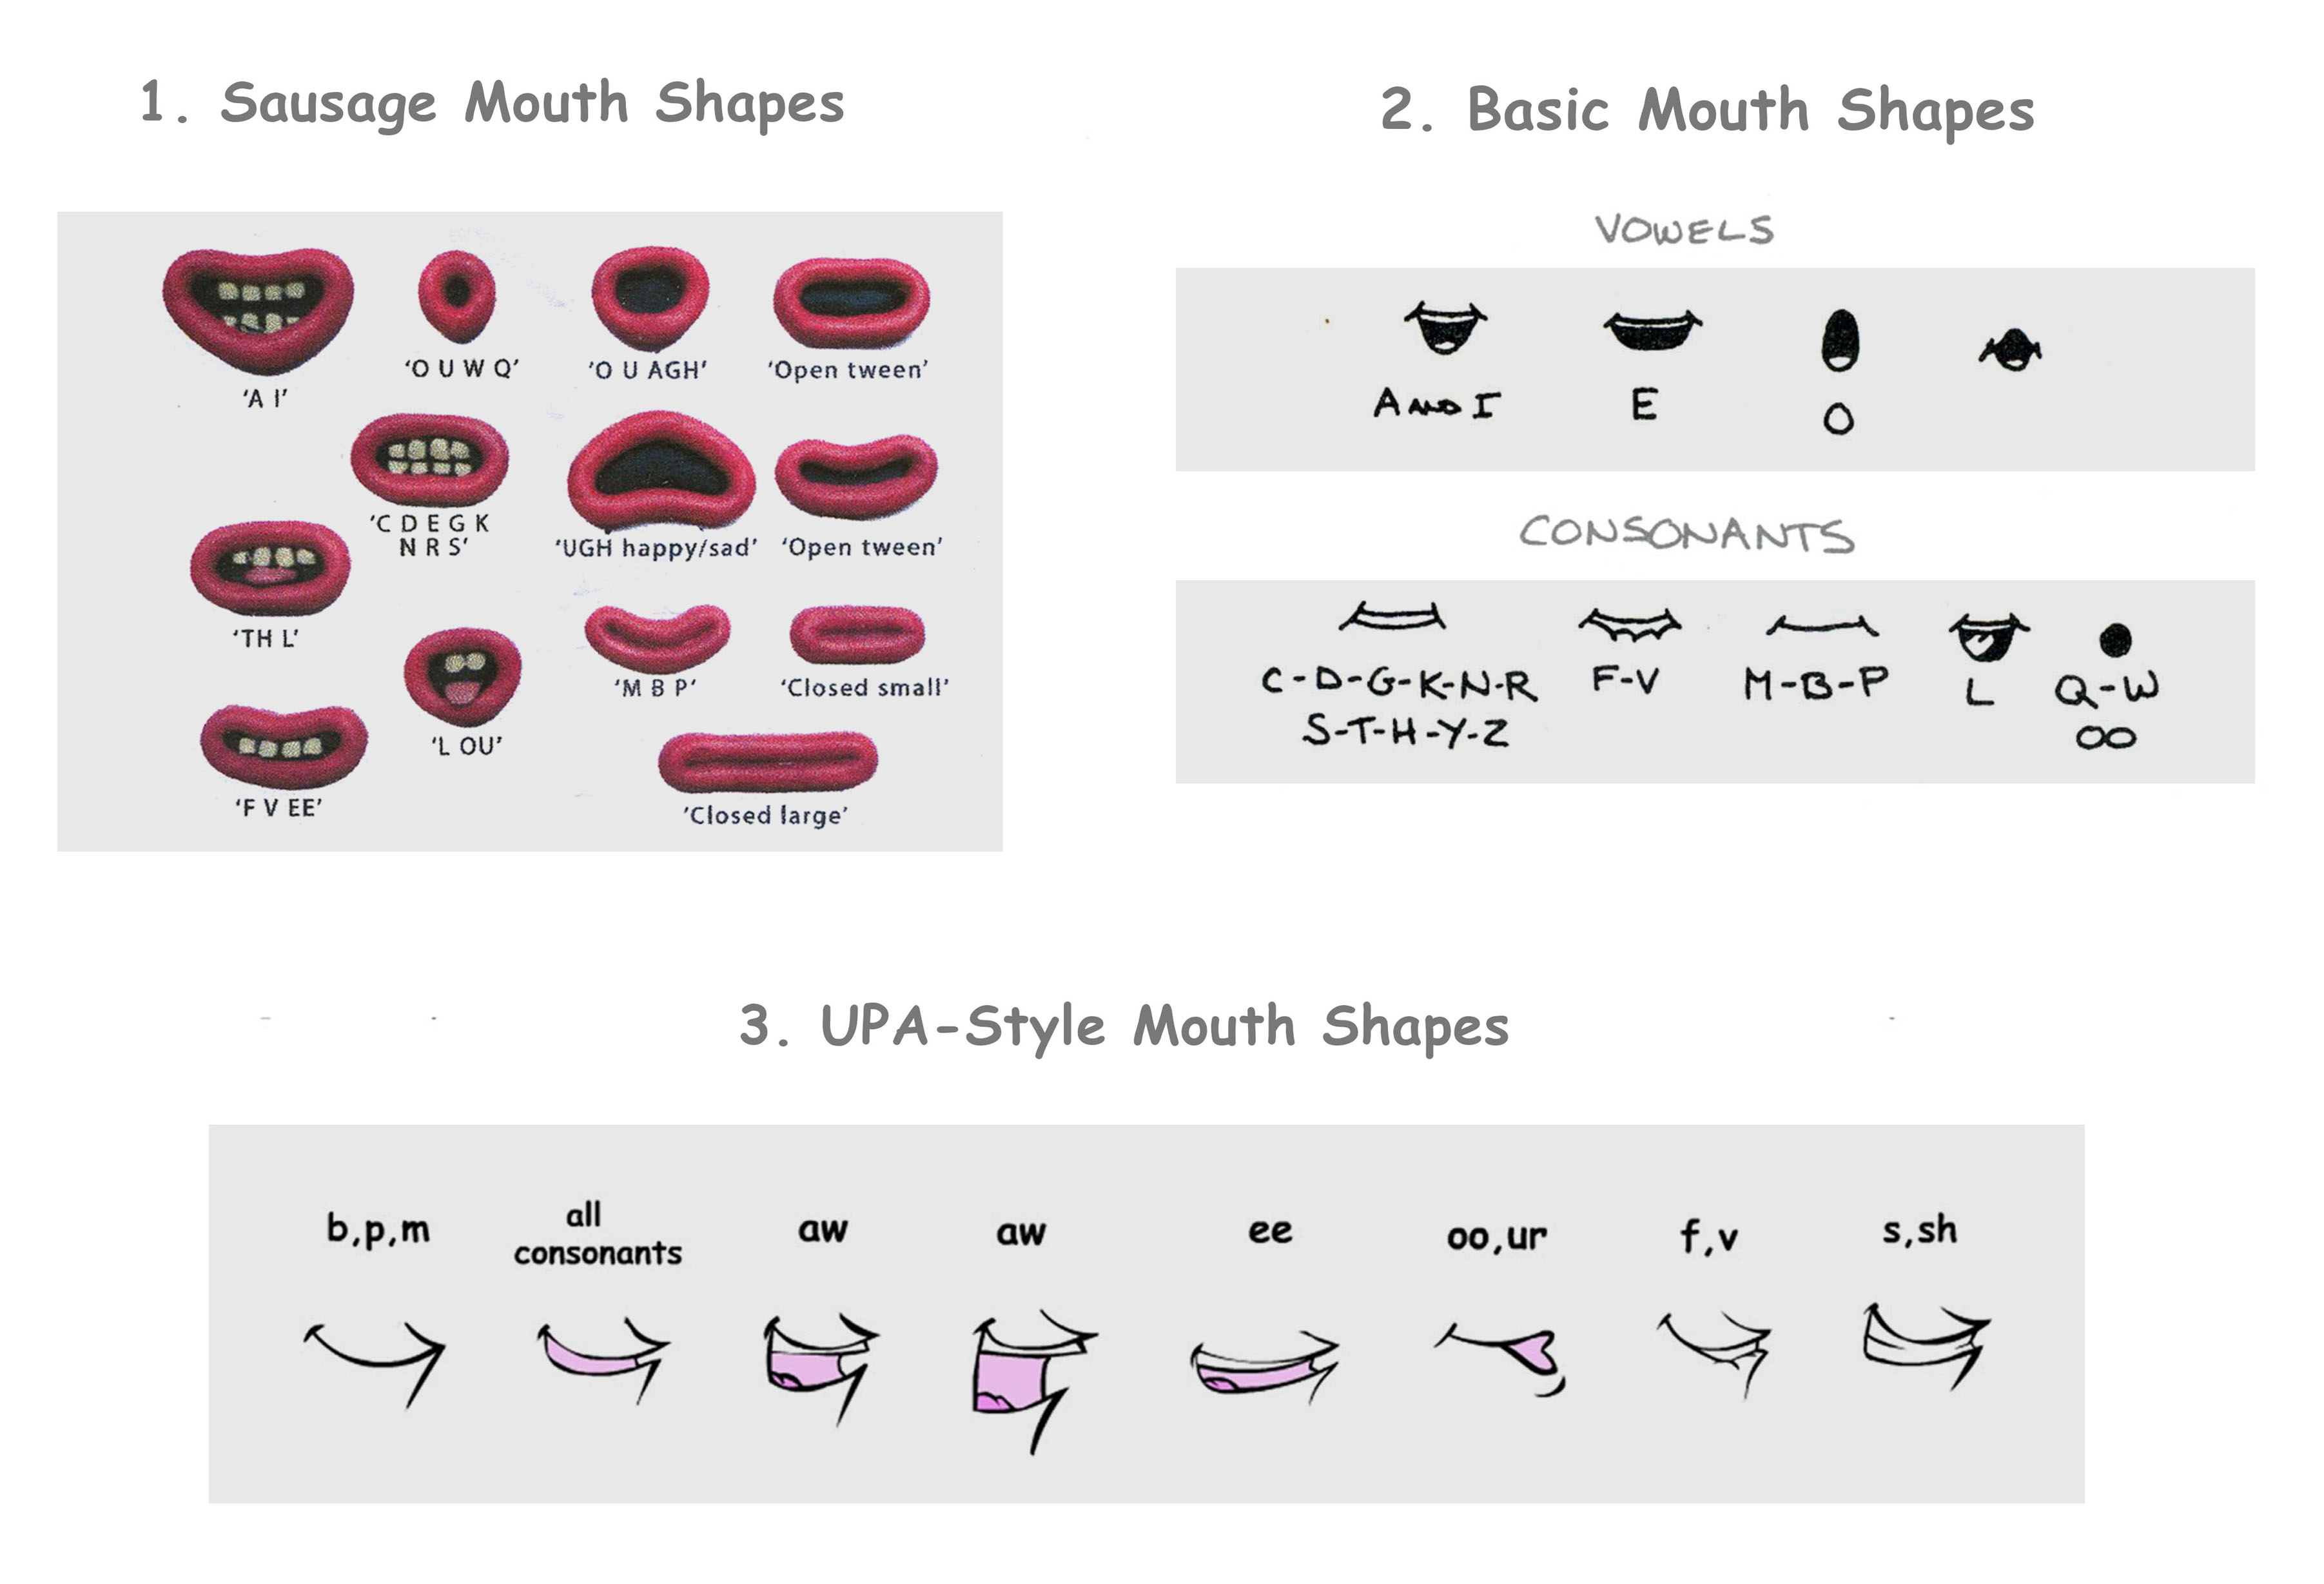
Choose one of these three basic lip-sync designs and import the corresponding mouth/eye set file (mouthEyeSet.psd) into Dragonframe. You can download the Lip-sync Set.zip file here. Follow the tutorial below for the complete work-flow from transcribing audio to loading the X-Sheet in Dragonframe.
Keep your work: You will need the Dragonframe project that you used to break down your audio to complete your final animation. Since you can't be sure that the same downshooter will be available it is HIGHLY RECOMMENDED that you keep a copy your Dragonframe project or that you work directly to your personal hard drive.
Tutorial: Dragonframe Lip-sync Tutorial.pdf
30 Day Trial Copy of Dragonframe: https://www.dragonframe.com/downloads/
Specs: Once the audio has been broken down and the phonemes and blinks have been assigned, export a playblast movie from Dragonframe and submit to the @DROPBOX.
Naming: simpsonB_lipSyncPlayblast.mp4

You will be creating a simple self-portrait with materials you can find around your house. Utile simple household materials, odds and ends, cardboard, newspaper, paper scraps fabric.
You can find lots of examples on the internet but here's a few to get you started.
What you will need:
Background: newspaper, construction paper, cardboard or fabric.
Adhesive: white glue, glue sticks, rubber cement or fabric glue.
Cutting Tools: Exacto knife, scissors, box cutter, razor blade, cutting wheel. Collage Materials: paper scraps, fabric scraps, cardboard, buttons, noodles, yarn, etc..
Set-up for taking a photo from home:
Lighting: Set up near a window in daylight. Resolution/Quality: Set camera at high resolution/quality. Edit Image: Use in-camera editing tool to adjust contrast, brightness and cropping.
Post & Submit: Post to final image to Discord channel
Name: simpsonB_portrait.jpg
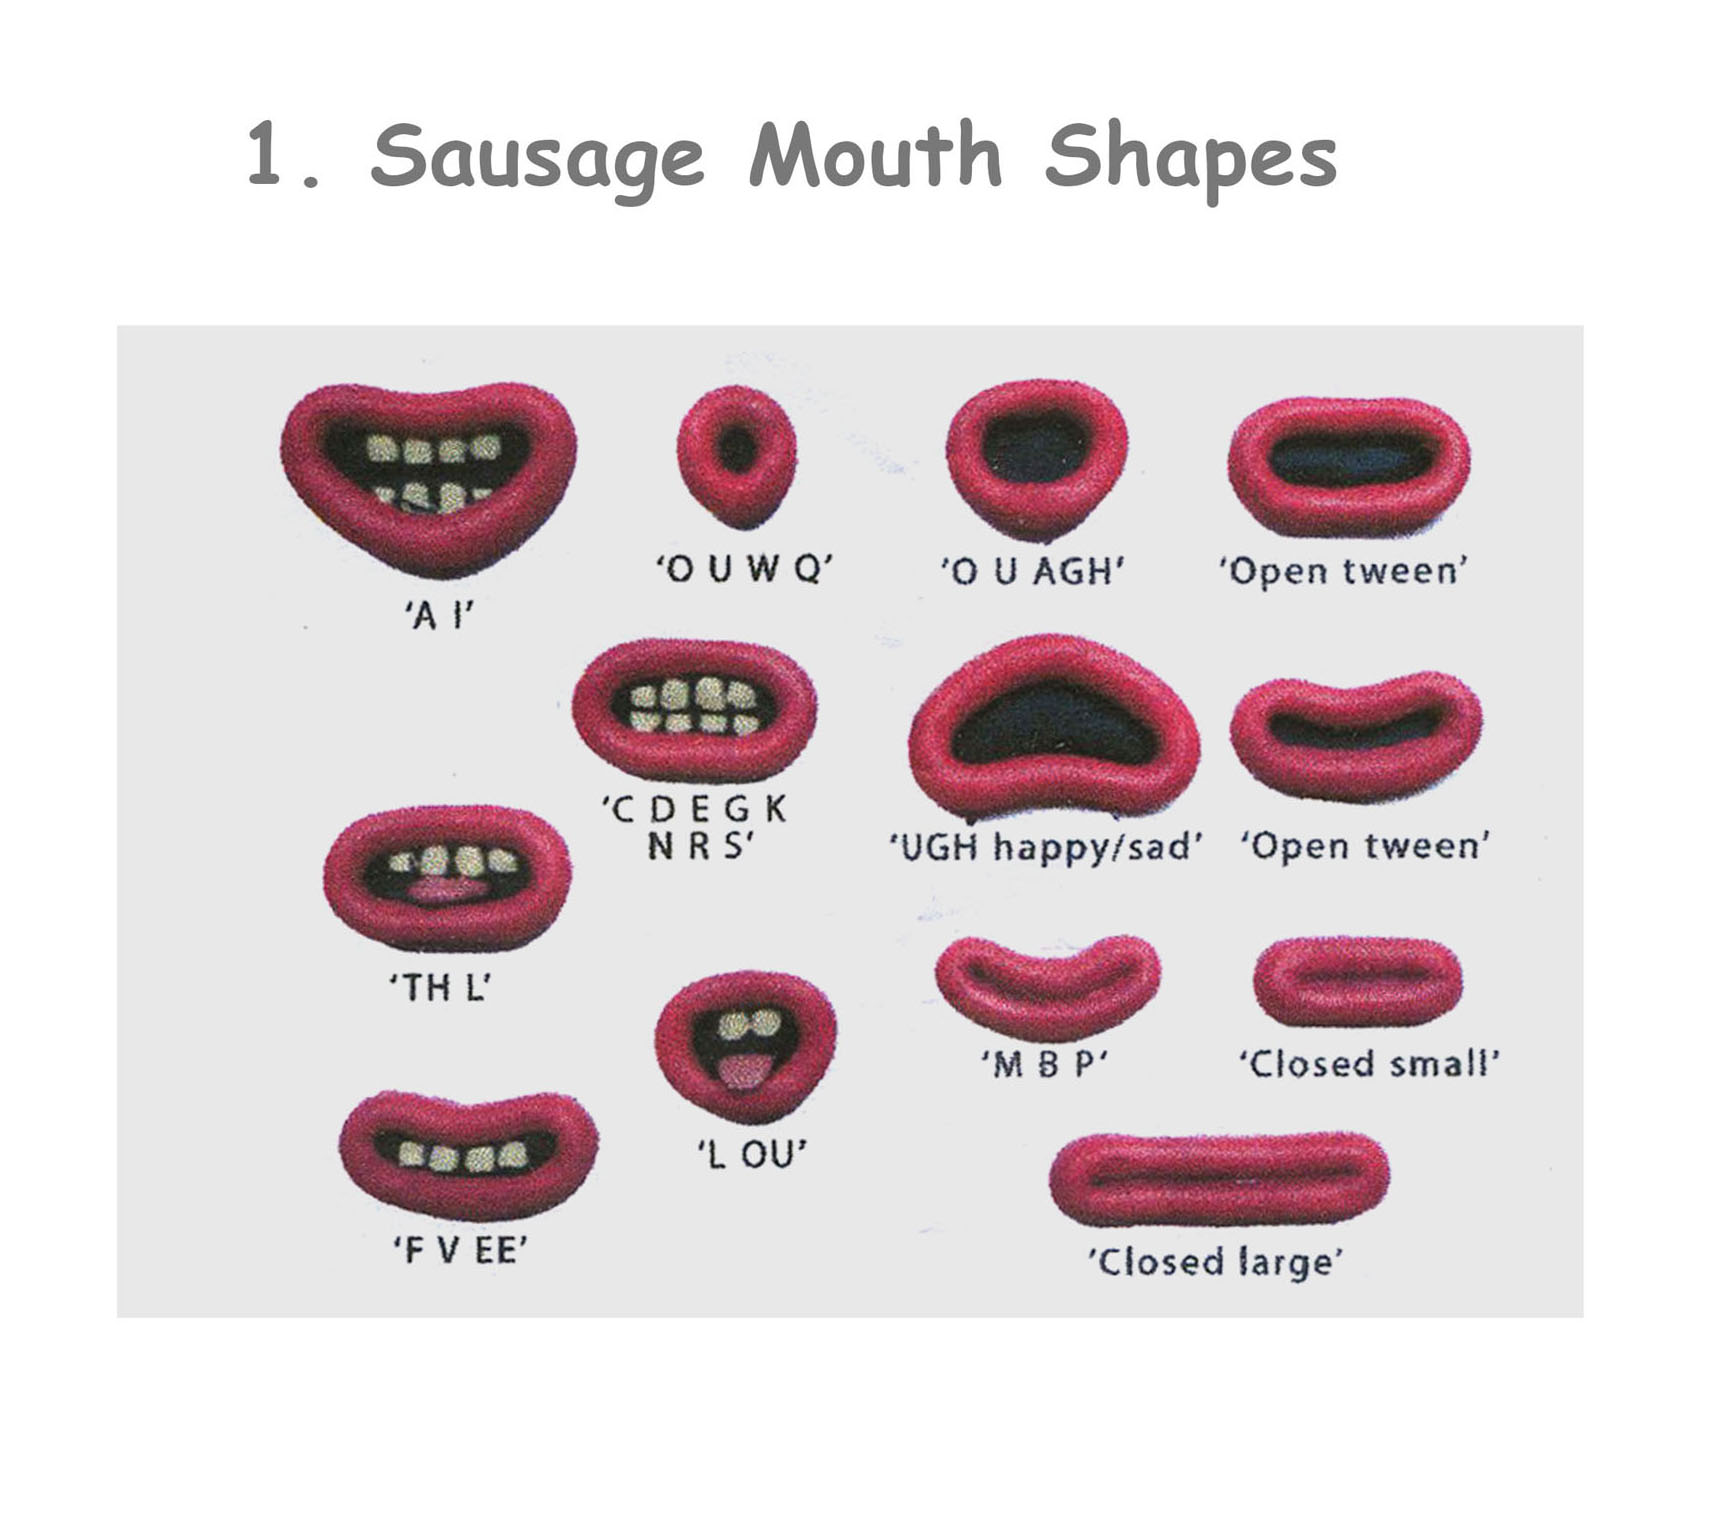
Choose a Mouth Shape Model and Design Character Phonemes: Once an audio clip has been selected and edited, use Dragonframe to break down the audio frame by frame to determine sound queues and arrange phonemes and blinks.
Start with a basic Mouth/Eye phoneme design. From there you will modify each phoneme in a way that best compliments your materials and the overall design of your self-portrait.

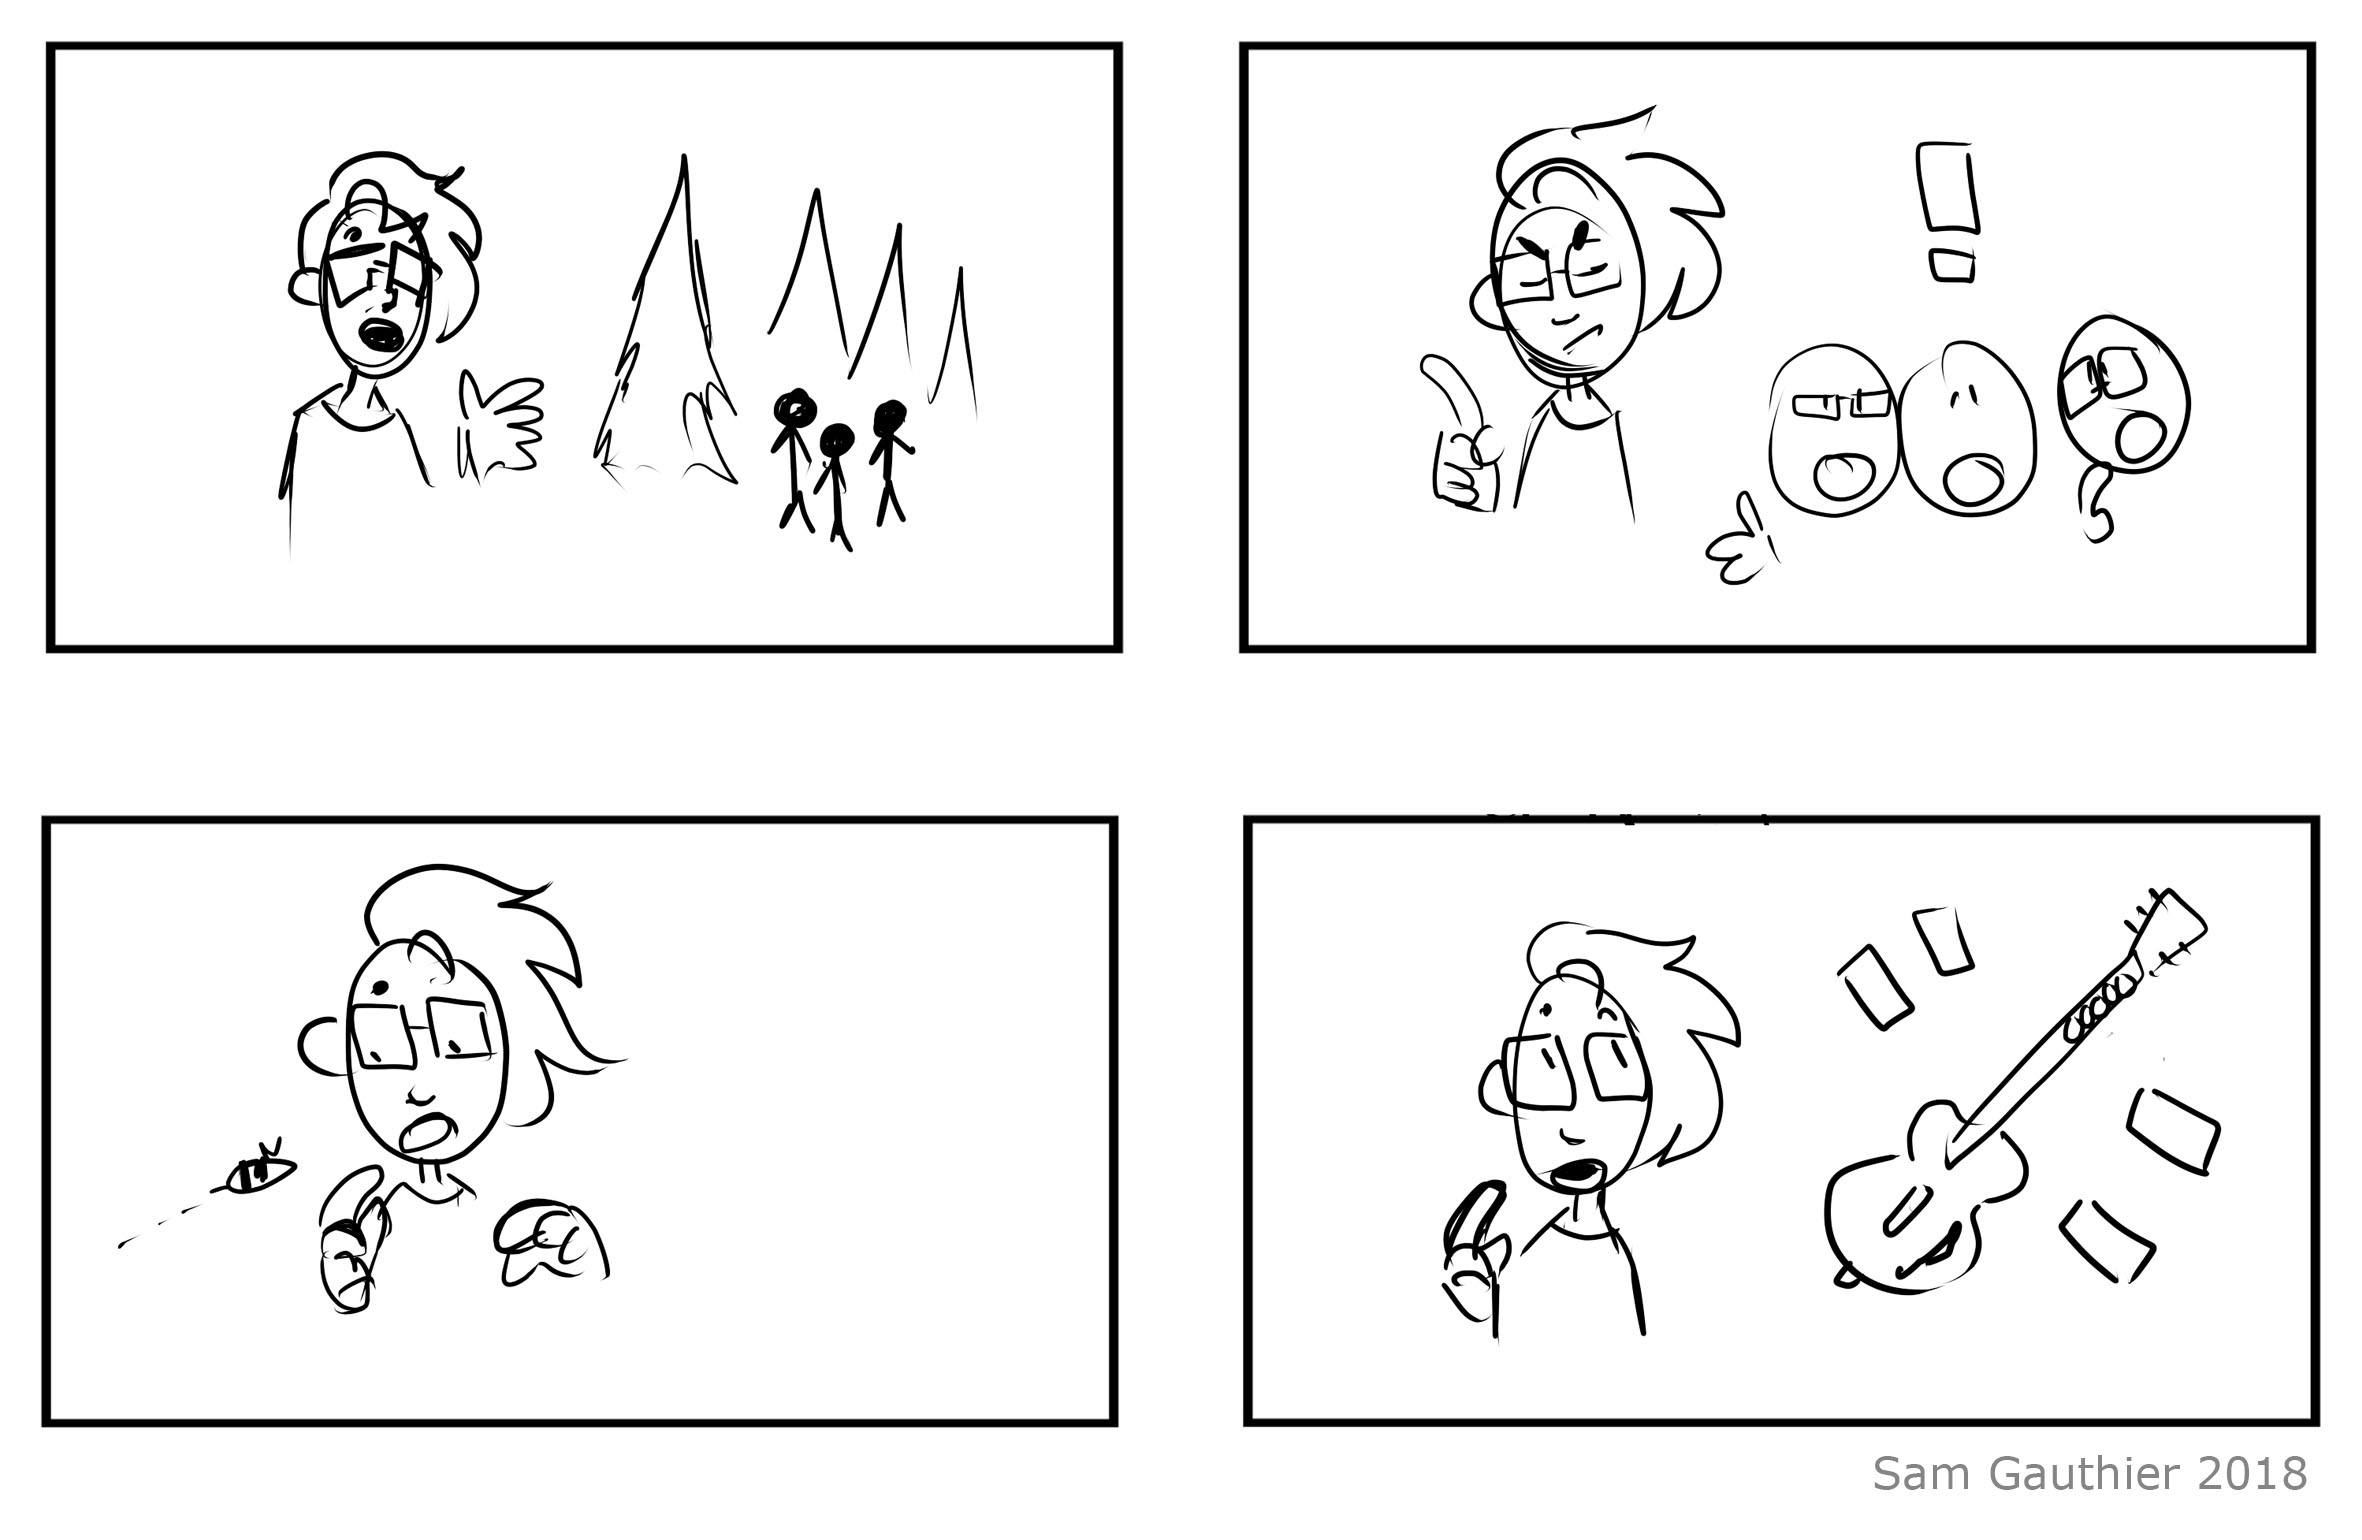
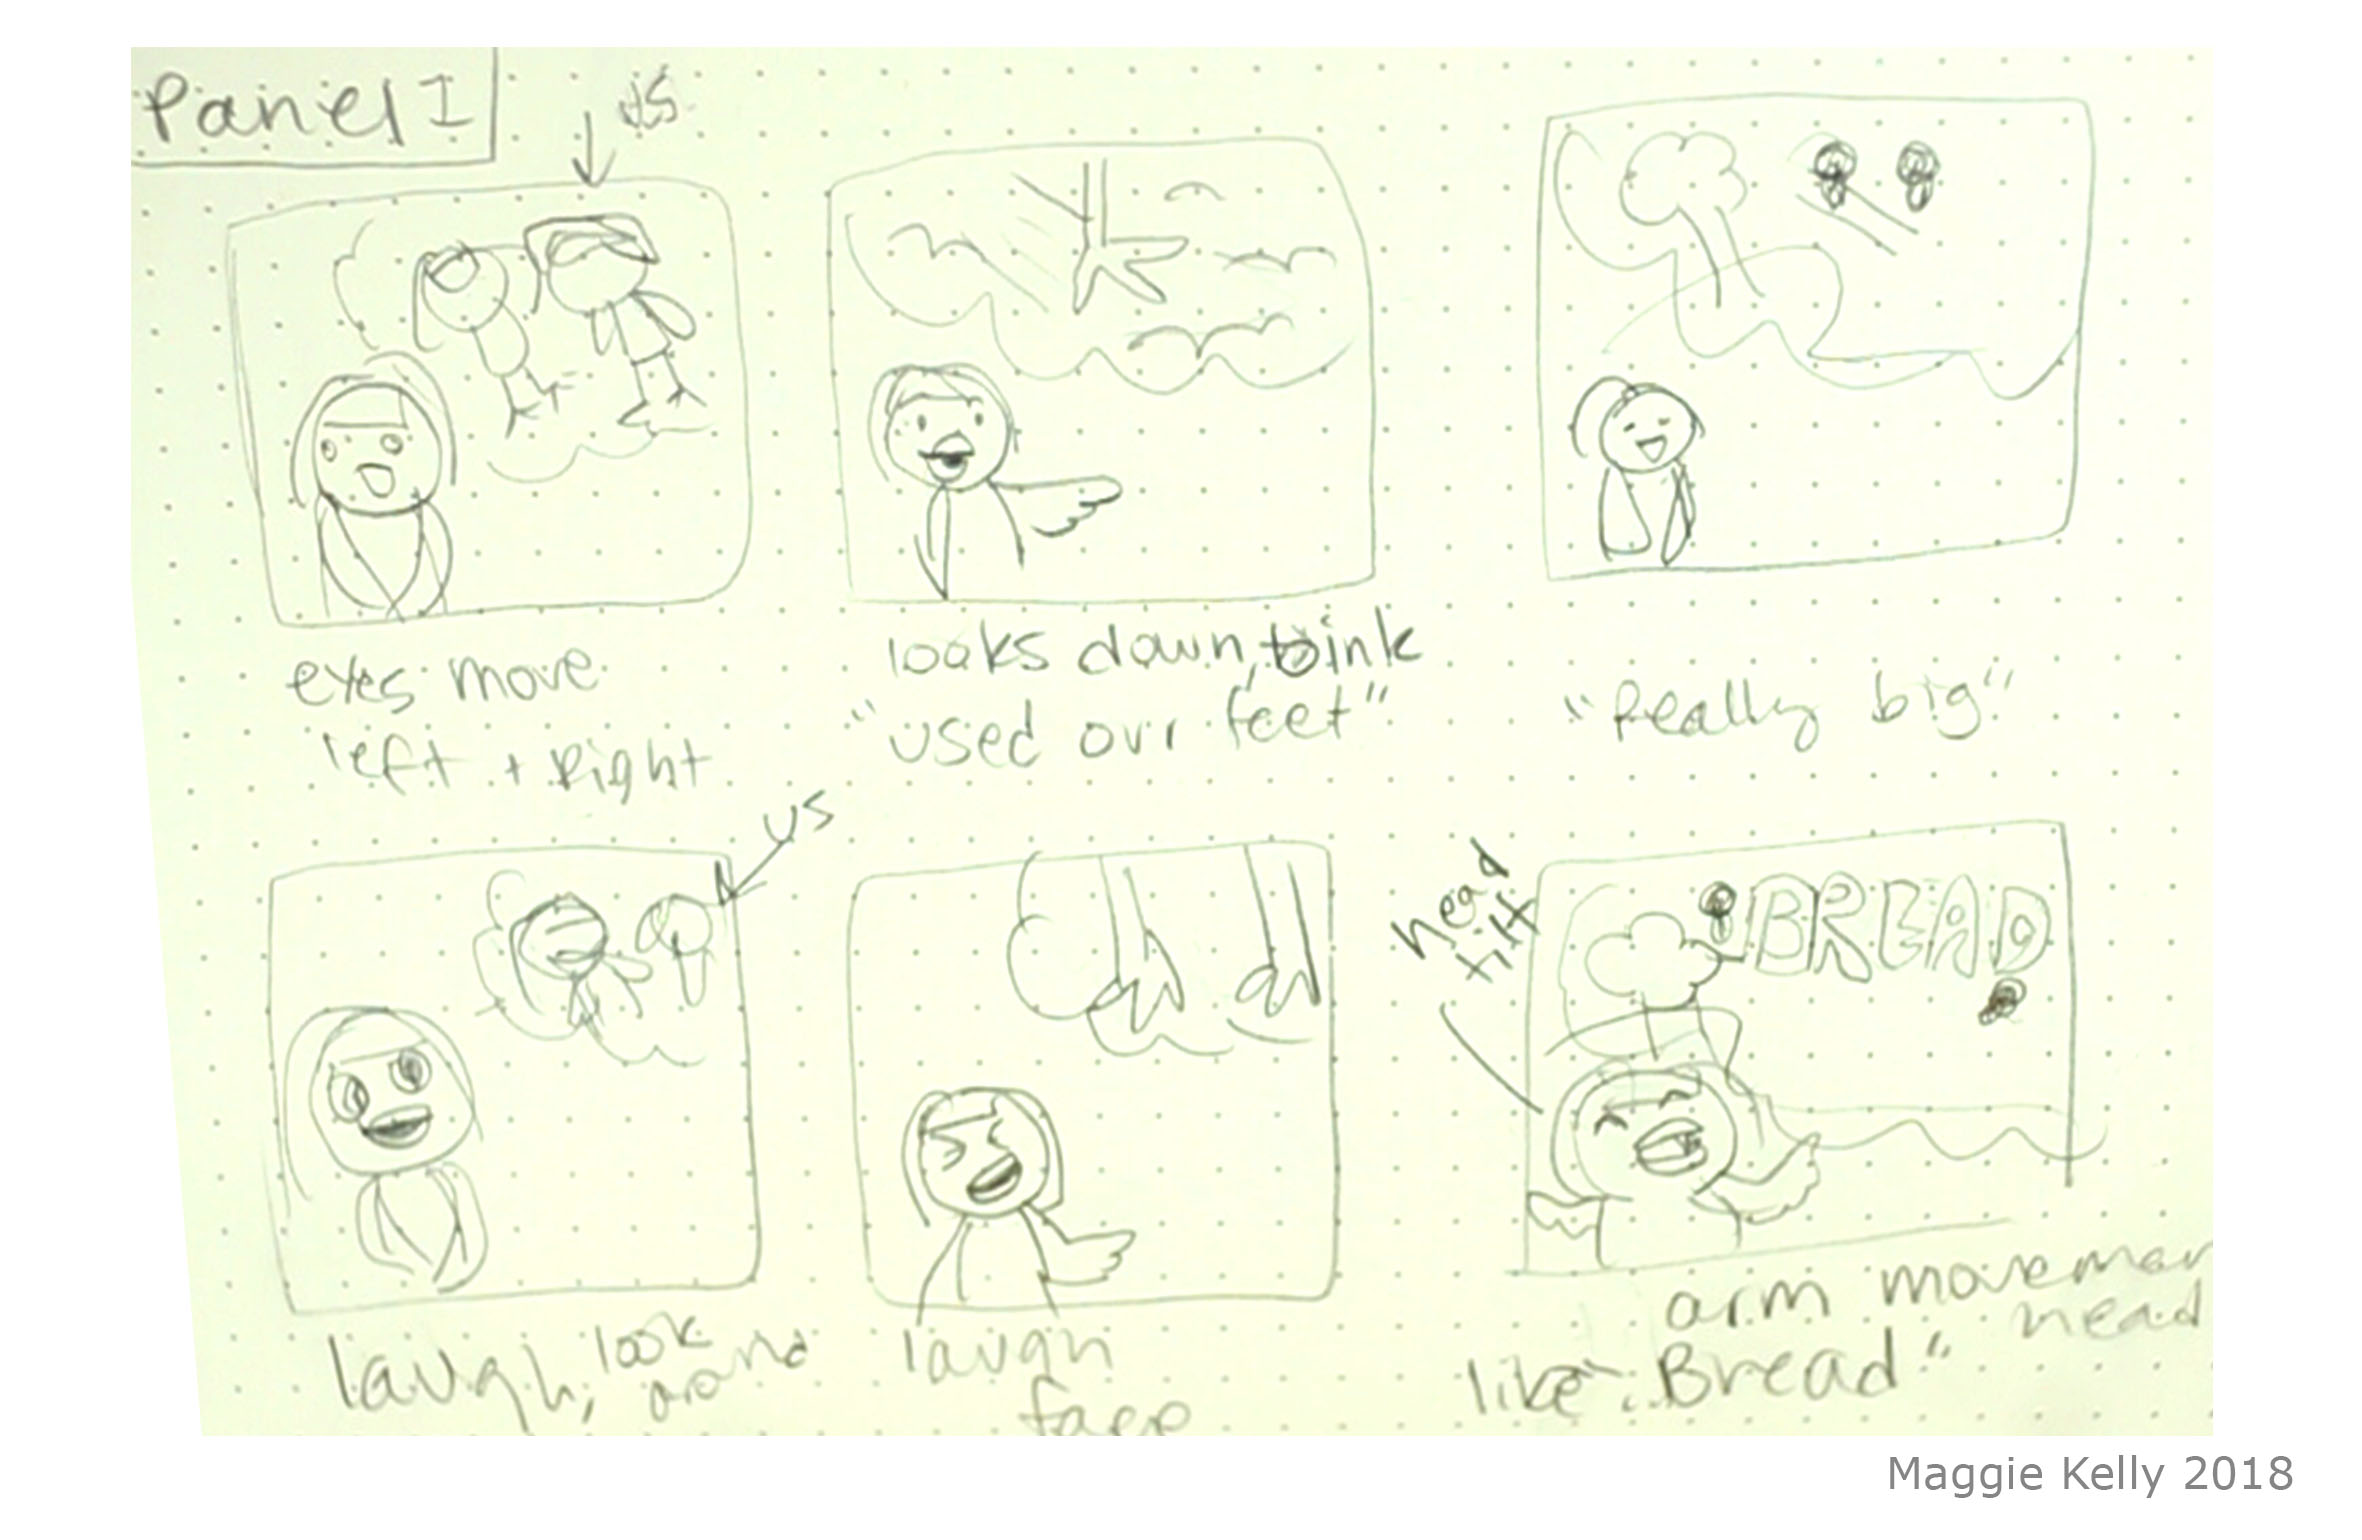
Using between 5 and 6 panels each, pitch TWO story scenarios that would complement your animated self portrait. Keep things simple as these are not the main act. Look for ways for your self-portrait to interact with the secondary animation. Sideways glances go a long way to make that connection.
Use this 6 Panel Story Pitch.jpg template to work out your story panels. You can work traditionally with a print-out our download to work digitally. Either way the final pitches will need to be submitted in two separate digital files. Try to use your story panels to reflect your final camera frame. Adding dialogue underneath the panels is a great way to plot out the relationship between the audio and the animation.
Example:
Specs:
Names:
simpsonB_clayPitch01.jpg
simpsonB_clayPitch02.jpg
8. PREPRODUCTION, FINAL ANIMATION SHOOT & POST

Time to finalize all your assets and make sure you have everything you need to shoot. Use the following checklist to make sure you are ready to start animating.
A. PRE-PRODUCTION CHECKLIST
- Self-Portrait
- Phonemes
- Test any secondary actions, shoulder shrugs, blinks, mouth placement, etc.
- Leave some room for subtle action before and after dialogue begins
- Avoid lip-sync in 1's by stressing consonants. Your mouth doesn't move that fast.
- Timing Notes in Dragonframe X-Sheet
B. FINAL ANIMATION CHECKLIST
- Timing queues in X-sheet for lip-sync, blinks, shrugs, etc.
- Clean glass and clay.
- Correct exposure, focus, white balance, etc.
- Adjust lighting and polarizing filter for limited glare
- Tape your Lens barrel to avoid focus slip!
C. POST-PRODUCTION/ADDING SOUND EFFECTS
Simple Sound effects can underscore simple moments and help make your animation believable. Keep in mind that good sound design is an art in itself and a little sound goes a long way. Here's a great website for free sound effects. https://freesound.org/
Final Specs:
- Shoot in 2's @24 fps/1's @ 12fps
- Final Lip-sync animation should be from 15 to 20 seconds (unless otherwise approved).
- Add Sound Effects
- Final Quicktime export should be Full Screen 1440 x 1080 H264
Post & Submit: Post to final piece to Discord channel and submit two versions to the Base Camp Drop Box. One with and one without sound effects (please name them accordingly). This way I'll have some leeway in my final edit of the the class reel.
Without Sound Effects: simpsonB_clayLipSync.mp4
With Sound Effects: simpsonB_clayLipSync_SFX.mp4
Tutorials/Resources:
Set Up Edit and Export in Premeire.pdf
Dragonframe: Lip-sync Tutorial.pdf
Stephan Leeper/Central Michigan University 2022